2. Quick Start
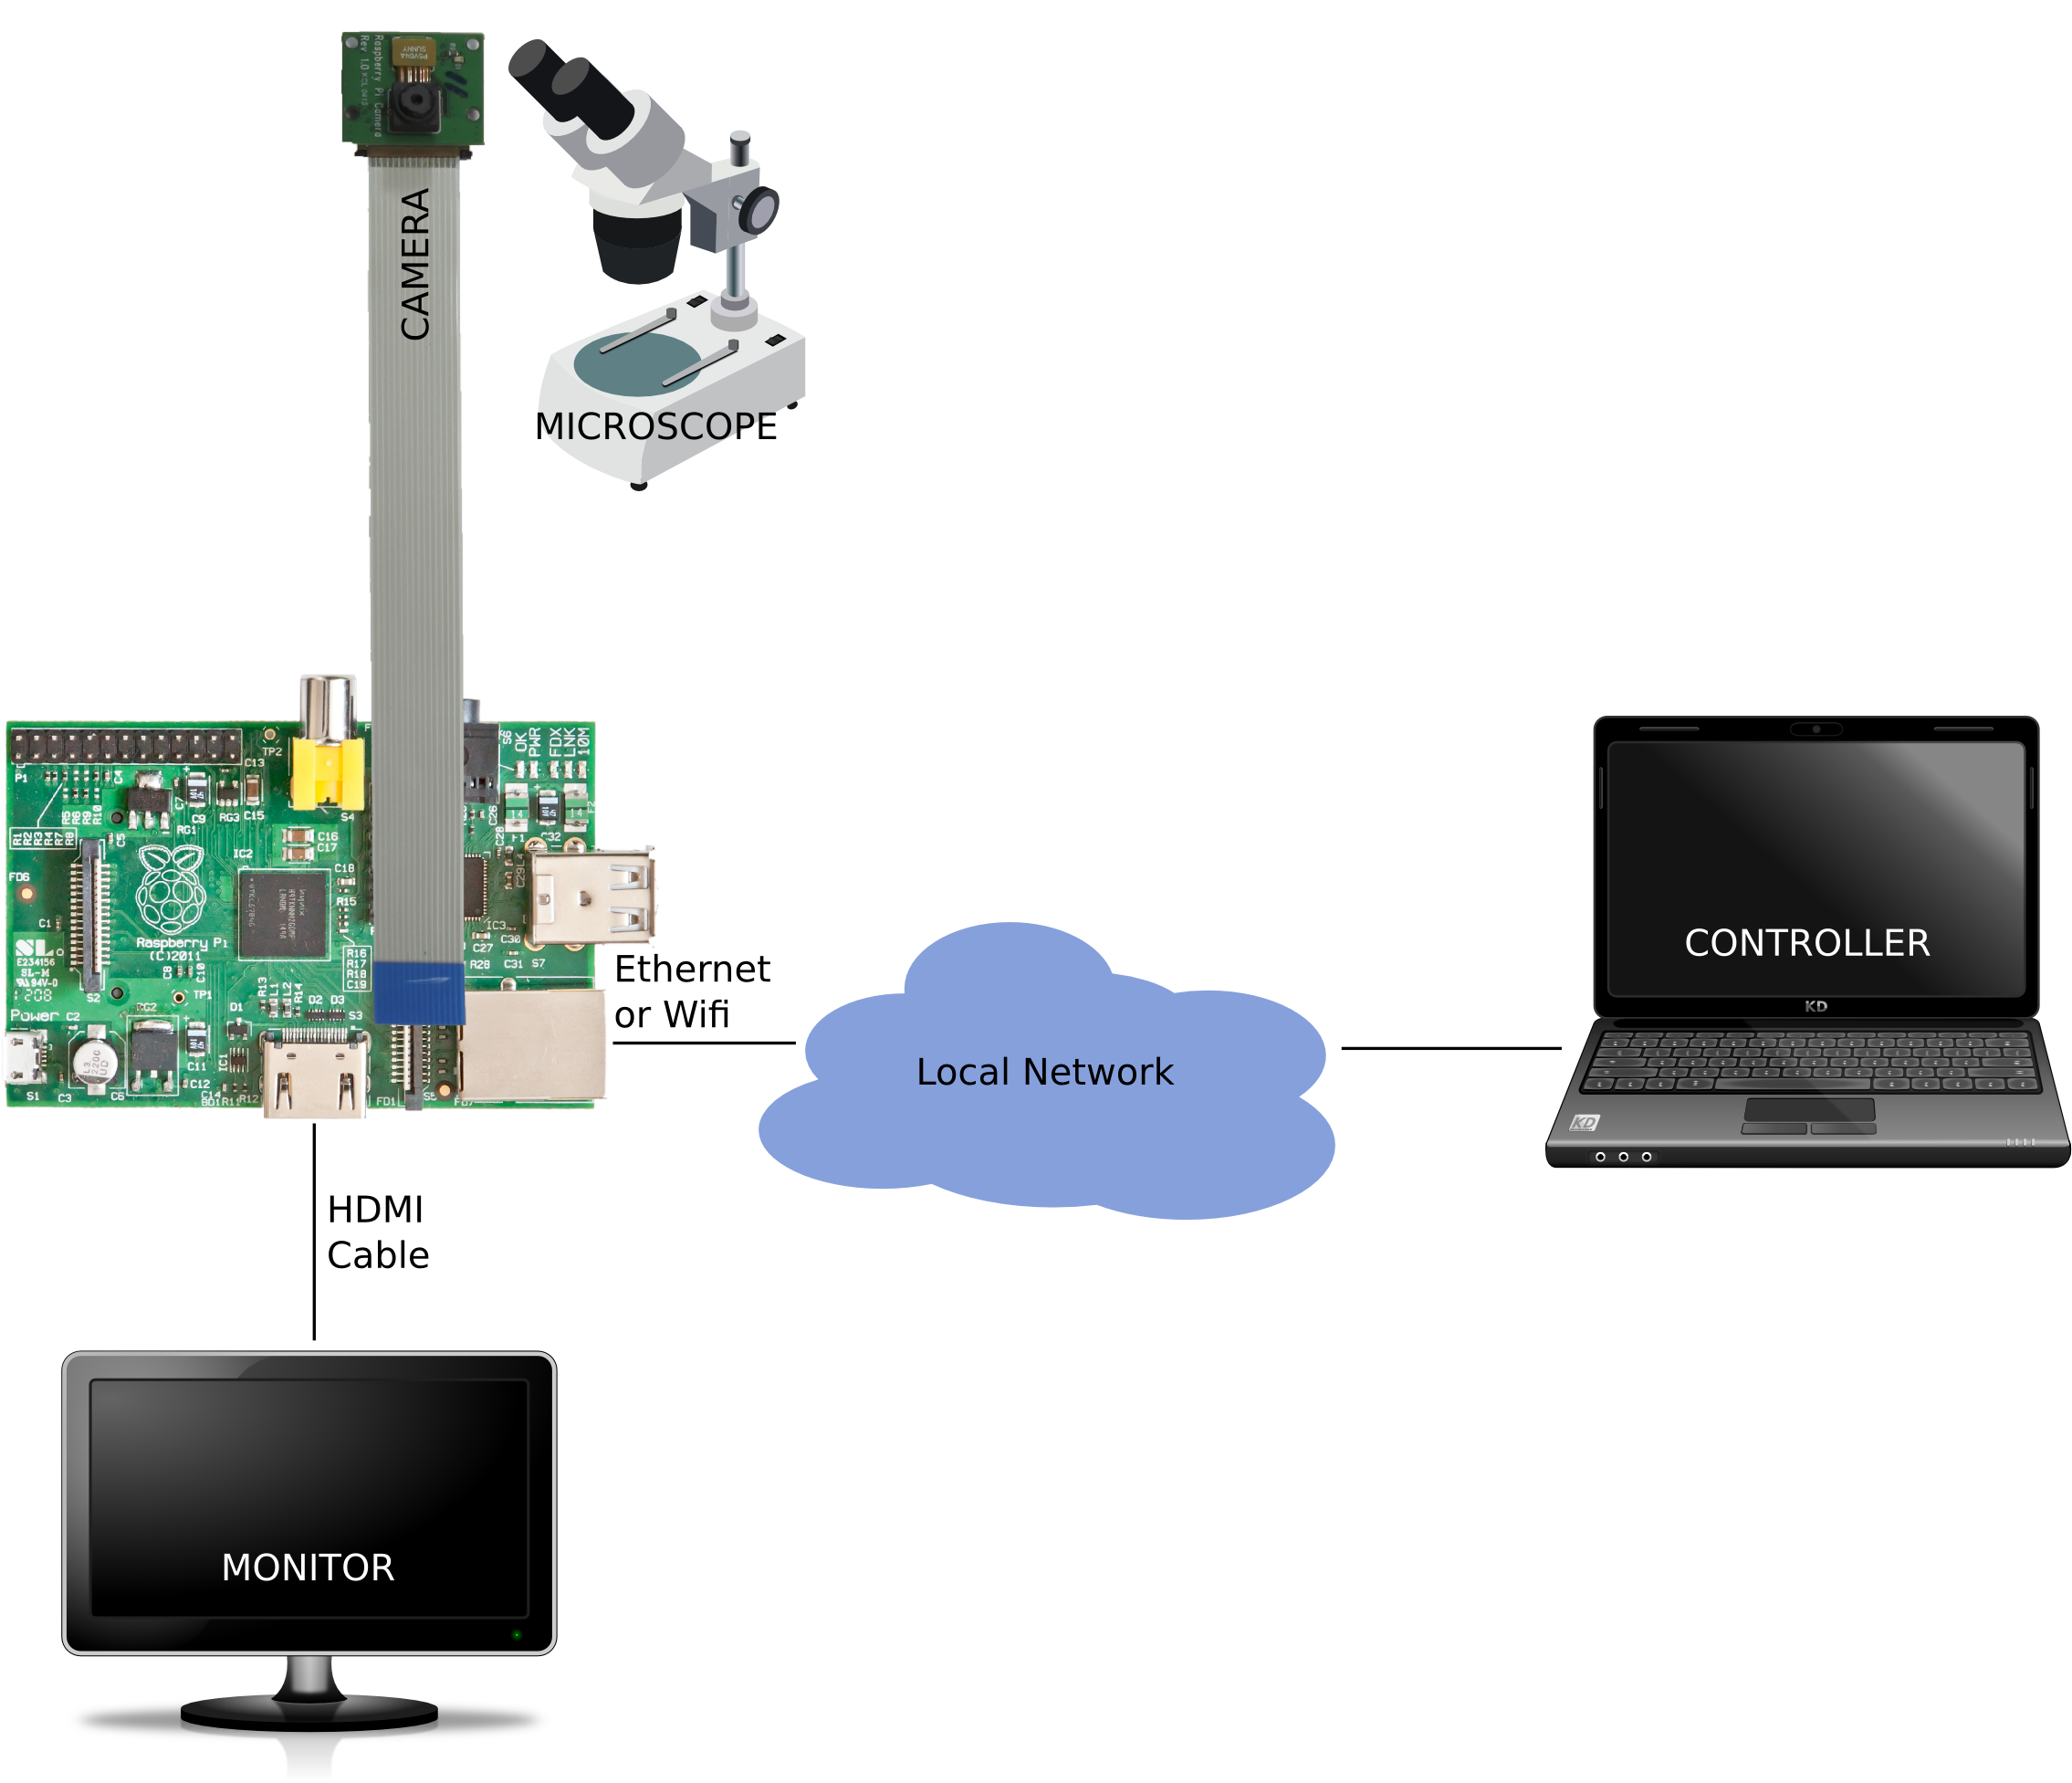
A typical Picroscopy setup is illustrated in the image below:

The Raspberry Pi’s camera is attached to the microscope. The exact manner in which the camera is mounted is left as an exercise for the reader. Simply taping the camera onto the eye-piece with electrical tape is usually sufficient for testing, but better results are generally obtained when the camera is held slightly away from the eye-piece.
The Raspberry Pi’s HDMI port is connected to a monitor or TV to display the live feed from the camera (to allow for positioning and focusing of samples). The Raspberry Pi is connected to the network via the Ethernet port (or wifi if you have a compatible USB wifi dongle).
Finally, a second machine (or phone/tablet with web-browser) is used as the controller.
When Picroscopy is started, it should automatically start a video preview on
the screen attached to the Pi. On a machine connected to the same network as
the Pi, open a web browser and browse to the address and port that Picroscopy
is listening on, e.g. http://mypi.example.com:8000/.
Note
Picroscopy listens on port 80 by default when it is run by
root, or on port 8000 when it is run by a non-root user.
The default page is the Library Page which displays the images taken by Picroscopy. Click on the Settings button and enter your name in the box at the top of the page, then click on Apply to return to the Library page.
Note
By default, Picroscopy requires a name before it will capture images (the name, and other settings like copyright are added to the EXIF tags of captured images).
Click on the Capture button to capture the image currently display on the
screen. The page should refresh and show a thumbnail of the captured image. At
this point, the Download button should be enabled. Clicking on this button
will download all captured images as a .zip archive.
If you entered your e-mail address on the Settings Page, the Send button should also be enabled. Clicking on this button will send an e-mail to your address with all captured images as attachments.
Finally, the Logout button will also be enabled. Clicking on this button will clear the Library of all captured images, and reset all fields on the Settings Page to their default values, ready for the next user.